


You have built something real: a WordPress blog running on the high-performance Foxiz theme by ThemeRuby, hosted on Hostinger, with posts, pages, images, categories, and, most critically, search engine rankings you have earned post by post. Switching to a new web address feels like handing all of that over to chance.
The fear is understandable. Stories of blogs that lost 60–80% of their organic traffic after a domain change are real, and they almost always trace back to the same cause: poor execution, not the domain change itself.
Here is the truth that most guides skip: if you follow the right sequence, a WordPress domain migration is a structured technical process, not a gamble. According to Google’s Own Documentation on site moves, a properly implemented domain migration with 301 redirects preserves link equity and allows Google to transfer ranking signals to the new domain. The keyword there is “properly implemented.”
This guide gives you exactly that: a precise, phase-by-phase execution plan built specifically for WordPress users on Hostinger running the Foxiz theme, updated for the tools and workflows available in 2026.
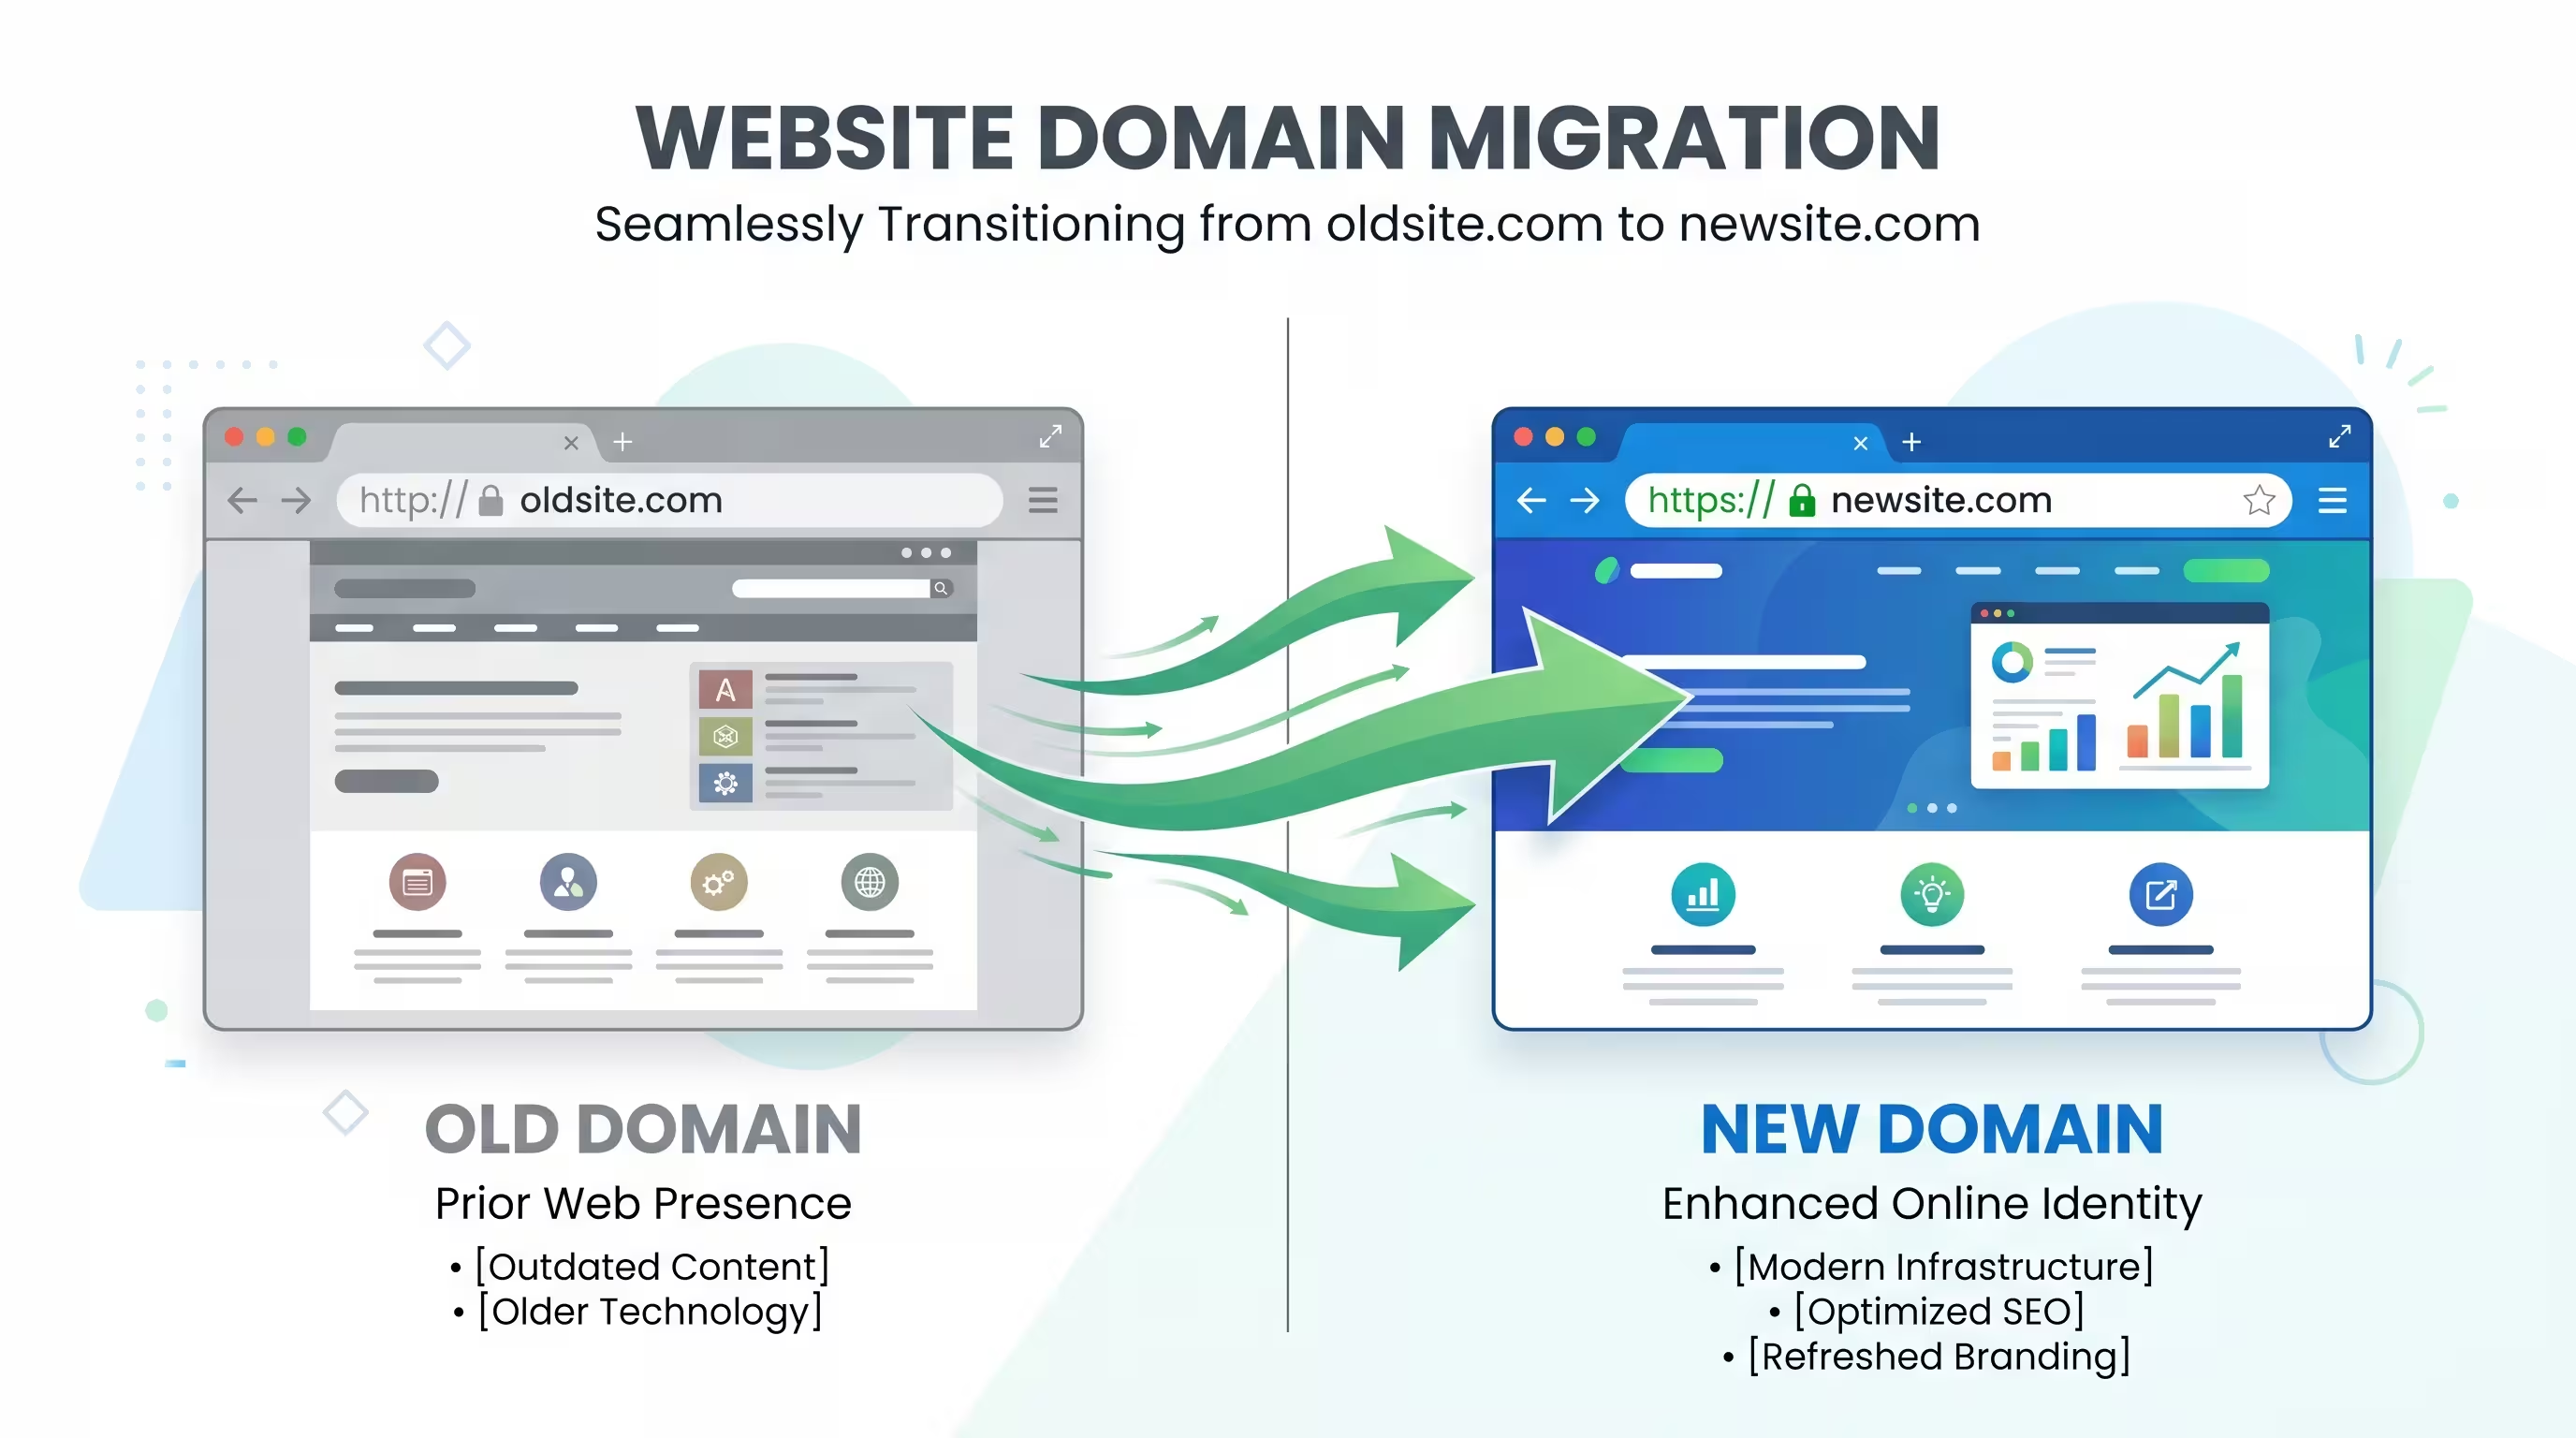
Table of Contents
Disclosure: Our content is engineered to help you make informed, data-driven, and smart decisions. Digital Solutions Edge is reader-supported; when you engage with our recommendations or click certain links, we may receive a commission. This support allows us to continue delivering the digital solutions you rely on. Thank you for being part of our community.
Phase 1: Pre-Migration Preparation: Do This Before You Touch Anything
Rushing into a domain change without preparation is the single biggest cause of traffic loss. This phase is your safety net.
Step 1: Audit Your Existing Blog URLs
Before any move, you need a complete map of your current site. Use a crawling tool like Screaming Frog SEO Spider (free up to 500 URLs) or a WordPress plugin like Ahrefs SEO Audit to crawl your old domain. Export every URL: posts, pages, category archives, tag pages, image files, and any custom URLs. Save this as a spreadsheet. This becomes your redirect map in Phase 5.
Step 2: Record Your Traffic and Ranking Benchmarks
Log into Google Analytics and Google Search Console right now. Screenshot or export your:
- Monthly organic traffic by page (last 3 months)
- Top 20 ranking keywords and their positions
- Core Web Vitals scores for your key pages
- Total number of indexed pages
These benchmarks are your reference points. After migration, you will compare against them weekly to identify and fix any losses.
Step 3: Create a Full Site Backup
This is non-negotiable. On Hostinger’s hPanel, go to Websites → Dashboard → Backups → Restore and Download. Download both your Files backup and your Database backup. Store copies in two places: your local computer and a cloud storage service like Google Drive.
If you use a WordPress backup plugin, UpdraftPlus and All-in-One WP Migration both work well. The goal is a complete, restorable snapshot of your site exactly as it is before any changes.
Step 4: Set Up Google Search Console for Your Old Domain (If Not Already)
Your old domain must be a verified property in Google Search Console (GSC) before you migrate. You cannot use the Change of Address tool in Phase 7 without it. If your old domain is already verified, confirm you have Owner-level access. If not, verify it immediately via a DNS TXT record, which Hostinger makes easy inside hPanel under Domains → DNS Zone Editor.
Step 5: Lower Your DNS TTL (Do This 48 Hours Before the Move)
This is a step most bloggers miss. DNS TTL (Time to Live) controls how long DNS records are cached across the internet. If your TTL is set to 86,400 seconds (24 hours), any DNS changes you make take up to 24 hours to propagate fully. Lower it to 300 seconds (5 minutes) at least 48 hours before your migration day. Do this in hPanel under Domains → DNS Zone Editor, editing the TTL value on your A record and CNAME records. This dramatically speeds up propagation when you make the final switch.
Phase 2: Register and Configure Your New Domain on Hostinger
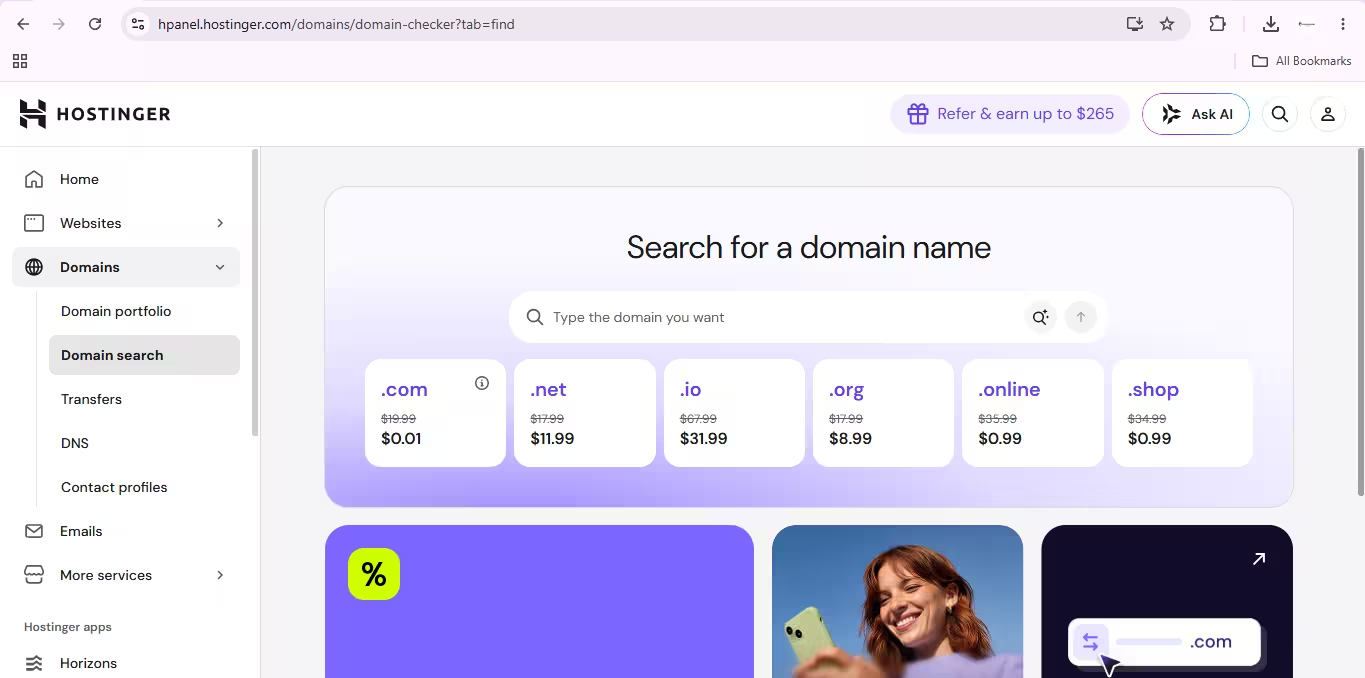
Since you are already hosted on Hostinger, registering and managing your new domain from within the same account keeps everything centralised and simplifies the next phases.
Choosing the Right New Domain Name
Keep it short, two to three words maximum. According to DomainDetails, the use of shorter, simpler domain names has lower typo rates and higher direct traffic. Avoid hyphens and numbers. If your niche is global, a .com extension remains the most trusted and recognised. If your primary audience is in Nigeria or another specific country, a country-code extension like .com.ng or .ng can add local search relevance.
Critically: check social media handle availability on Instagram, X (Twitter), Facebook, and YouTube before you commit to a name. Brand consistency across platforms matters more in 2026 than it ever has.
Adding Your New Domain to Your Hostinger Account
Once you have registered your new domain, add it to your existing Hostinger hosting plan. In hPanel, go to Websites → Add Website → WordPress, then enter your new domain name. You do not need to install a fresh WordPress installation at this stage; the Copy Website method in Phase 3 handles that. Simply add the domain to your account and verify that it is active in your Websites list.
Phase 3: The Hostinger Copy Website Method: The Fastest Route Forward
This is where Hostinger users have a significant advantage over bloggers on other hosts. Hostinger’s built-in Copy Website feature, available on Premium plans and above, replicates your entire WordPress installation to the new domain automatically, including the database, and updates all internal domain references in the process.
Here is the exact process:
Step 1: Log in to hPanel and navigate to the Websites section. Click Dashboard next to your current WordPress blog (the old domain).
Step 2: In the left sidebar, click on WordPress → Copy Website.
Step 3: In the dropdown menu that appears, select your new domain as the destination. If your new domain does not appear in the list, it has not yet been added to your Hostinger account; go back and complete Phase 2 first.
Step 4: You will see a warning that copying will overwrite any existing content on the destination domain. Since your new domain is fresh and empty, check the confirmation box and click Start Copying Anyway.
Step 5: Wait. The process takes up to 15 minutes, depending on the size of your blog. Do not make any changes to either domain during this window.
Step 6: Once completed, Hostinger will show a confirmation status. Test the new domain by visiting it in a browser. You should see a fully functional copy of your blog, with all posts, pages, theme settings, widgets, and plugin configurations intact.
According to Hostinger’s Support Documentation, the Copy Website tool updates all domain name references in the database automatically during the copying process. This saves you significant time and reduces the risk of broken links.
A note for users on Hostinger’s Starter/Single plan: The Copy Website feature requires a Premium plan or higher. If you are on the entry-level plan, you will need to use the manual method: export your database from phpMyAdmin, download your files via the File Manager, install WordPress fresh on the new domain, upload the files, import the database, then run Better Search Replace as described in Phase 4.
Phase 4: Update All URLs in Your WordPress Database
Even with Hostinger’s Copy Website tool handling the bulk of the URL updates, running a manual database search-and-replace sweep is a best practice. It catches any hardcoded URLs in widget content, custom HTML blocks, or serialised data that the automated tool may have partially updated.
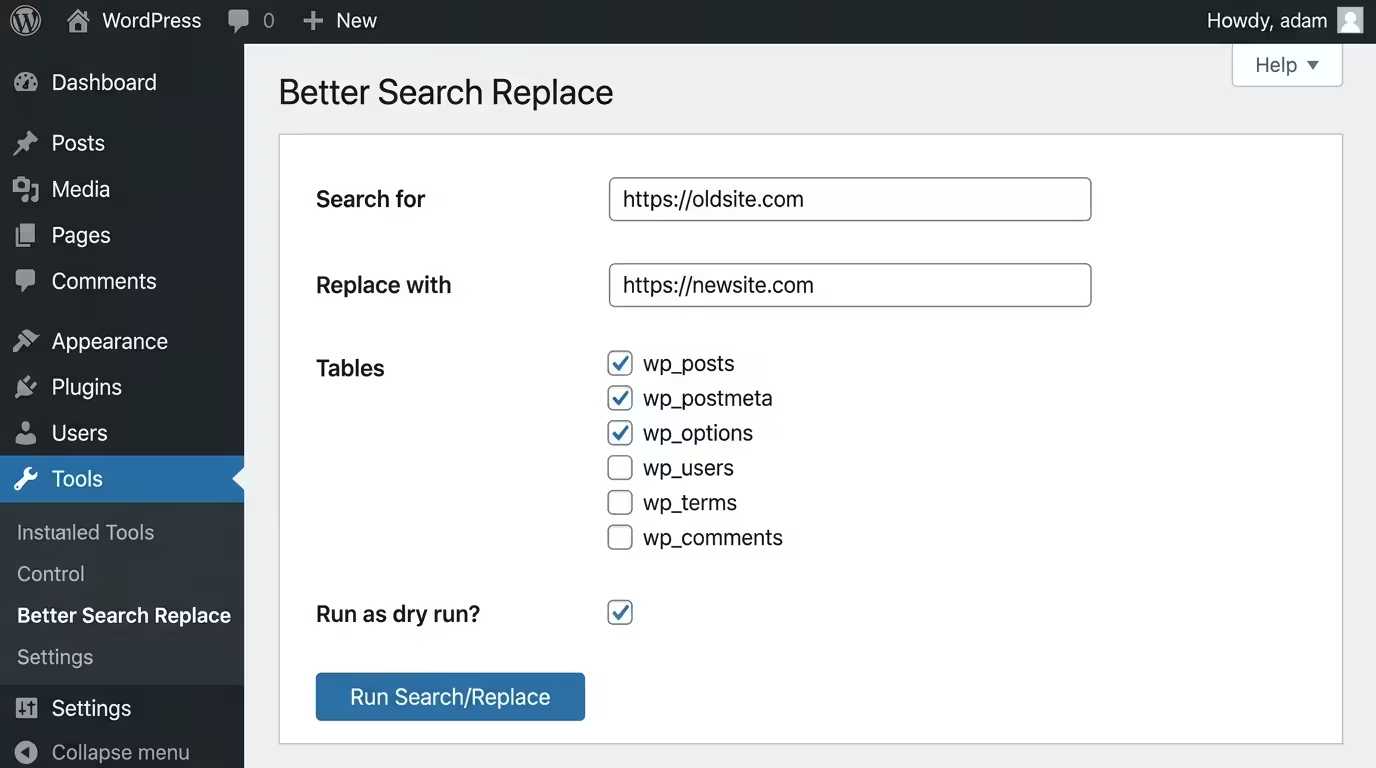
The safest tool for this is the Better Search Replace plugin.
Step 1: On your new domain’s WordPress dashboard, install and activate Better Search Replace from the Plugins menu (Plugins → Add New → Search for “Better Search Replace”).
Step 2: Go to Tools → Better Search Replace.
Step 3: In the Search field, enter your old domain URL (e.g., https://olddomain.com). In the Replace with field, enter your new domain URL (e.g., https://newdomain.com).
Step 4: Select all tables in the Select Tables section. Check the Run as dry run box and click Run Search/Replace. This shows you how many instances it finds without making any changes.
Step 5: Review the dry run results. If the count looks reasonable (proportional to your post count and media library size), uncheck the Run as dry run box and run the replacement for real.
Step 6: Clear your Foxiz theme cache and any server-side caching (LiteSpeed Cache on Hostinger, if active) immediately after this step. Cached data sometimes holds old URLs. In the Foxiz theme settings, go to Theme Options → Performance and clear any stored CSS or caching layers the theme manages.
Phase 5: Set Up 301 Redirects on Your Old Domain
This is the most critical SEO step of the entire migration. A 301 redirect tells search engines and browsers: “This content has permanently moved to a new address. Transfer all authority, link equity, and ranking signals to the new location.”
Without 301 redirects, every existing backlink pointing to your old domain becomes a dead end. All the SEO authority you have built evaporates. With properly implemented redirects, studies by Moz confirm that 301 redirects pass approximately 90–99% of link equity to the destination URL.
The Recommended Method: Use a Plugin on Your Old Domain
Do not delete or abandon your old domain yet. Keep it active and install the Redirection plugin or Rank Math SEO (if you are already using it) on your old WordPress installation.
Using Rank Math SEO (Recommended for Foxiz Users):
Foxiz supports Rank Math natively, and most Foxiz-based blogs already have it installed. In your old domain’s WordPress dashboard, go to Rank Math → Redirections → Add New. Create a rule:
- Source URL: /(.*) (this uses a regex wildcard to catch all URLs)
- Destination URL: https://newdomain.com/$1
- Redirect Type: 301 Permanent Move
This single rule redirects every page on your old domain to its counterpart on the new domain. A post at olddomain.com/how-to-do-seo will redirect to newdomain.com/how-to-do-seo.
Using .htaccess (Advanced):
If you prefer direct server-level control, access your old domain’s .htaccess file via hPanel → File Manager → public_html → .htaccess. Add the following code at the top of the file:
Options +FollowSymLinks
RewriteEngine On
RewriteCond %{HTTP_HOST} ^olddomain\.com$ [OR]
RewriteCond %{HTTP_HOST} ^www\.olddomain\.com$
RewriteRule (.*)$ https://www.newdomain.com/$1 [R=301,L]
Replace olddomain.com and newdomain.com with your actual domain names. This tells the Apache server on Hostinger to permanently redirect all traffic from your old domain to the corresponding page on the new one.
Critical warning: Do not redirect all old pages to the homepage. This is called a “soft 404”, and Google treats it as a technical error, not a valid redirect. Every old URL should redirect to its exact equivalent on the new domain.
Phase 6: Foxiz Theme-Specific Checks After Migration
The Foxiz theme by ThemeRuby stores several configuration values that reference your site URL, particularly in its Theme Options panel, cached CSS files, and Elementor data (if you use Elementor with Foxiz). After migration, complete these specific checks:
1. Reactivate Your Foxiz Theme License
Foxiz uses a purchase code activation system tied to your domain. After copying to a new domain, go to Appearance → Foxiz Theme → Activate and re-enter your ThemeForest purchase code to activate the theme on the new domain. Without reactivation, auto-updates and premium support access may be restricted. Foxiz
2. Regenerate Foxiz Dynamic CSS
Foxiz generates dynamic CSS files based on your theme customisations and stores them as files. After migration, force a CSS regeneration. In the WordPress dashboard, go to Appearance → Theme Options → Advanced → Regenerate CSS. This ensures any URL-based assets referenced in the dynamic CSS reflect the new domain.
3. Check Elementor Data (If Applicable)
If you use Elementor alongside Foxiz, run Elementor’s built-in URL replacement tool. Go to Elementor → Tools → Replace URL, enter your old domain in the “From URL” field and your new domain in the “To URL” field, and click Replace URL. This updates any domain references stored in Elementor’s own data structure, which sits separately from the standard WordPress database tables.
4. Clear All Caching Layers
If you have LiteSpeed Cache, WP Super Cache, W3 Total Cache, or WP-Optimize active (all of which Foxiz officially supports), clear every caching layer after migration. On Hostinger, LiteSpeed Cache is the default server-side cache. In your new domain’s dashboard, go to LiteSpeed Cache → Dashboard → Purge All. Also, clear your Cloudflare cache if you use it.
5. Test Ad Placements and Monetisation
Foxiz has built-in ad slot support. If you run Google AdSense or affiliate ad placements through the Foxiz ad management system, verify that your ad codes are rendering correctly on the new domain. Some ad networks require you to add the new domain to your approved sites list before ads will display or generate revenue.
Phase 7: Notify Google of the Change of Address Process
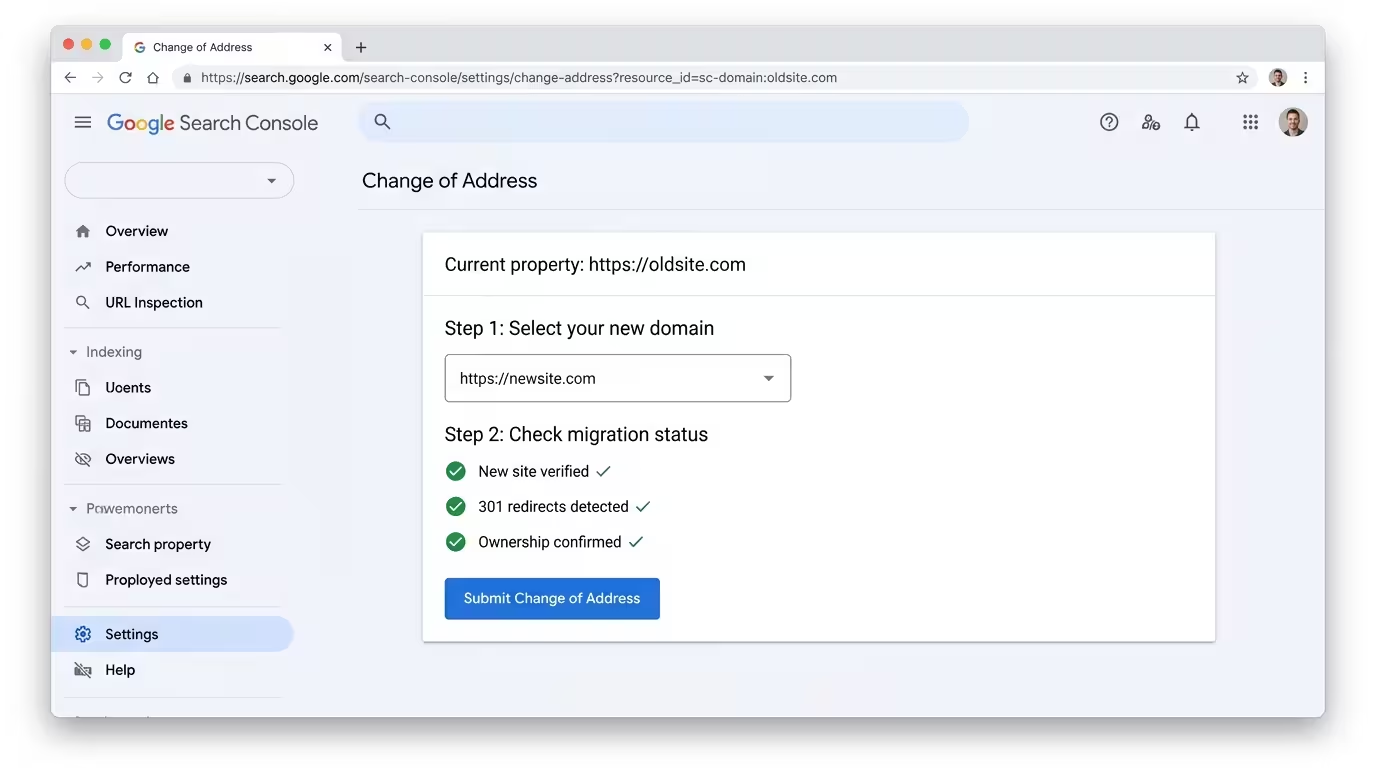
Your 301 redirects tell Google where your content has moved. The Change of Address tool in Google Search Console tells Google directly, accelerating the process.
Step 1: Verify your new domain as a property in Google Search Console. Go to GSC → Add Property, enter your new domain, and verify ownership via a DNS TXT record in Hostinger’s hPanel.
Step 2: On your old domain’s GSC property, go to Settings → Change of Address.
Step 3: Select your new domain from the dropdown and click Validate and Update.
Google will run a series of checks to confirm your 301 redirects are properly set up before accepting the change. If the validation fails, revisit Phase 5 and confirm your redirects are working correctly.
Step 4: Submit a new XML sitemap for the new domain. In your new WordPress dashboard, if you use Rank Math, go to Rank Math → Sitemap Settings and copy your sitemap URL (typically newdomain.com/sitemap_index.xml). In your new domain’s GSC property, go to Sitemaps and submit this URL. This instructs Google to crawl and index your new domain’s pages immediately.
Step 5: Repeat Step 4 for Bing Webmaster Tools. Many bloggers overlook Bing, but Bing’s index powers several other search engines and voice assistants, making it worth the five-minute effort.
Phase 8: Post-Migration Monitoring Checklist
The work does not end at launch. The first four to six weeks after a domain migration are the most important monitoring window.
Week 1:
- Verify all 301 redirects are functioning using a tool like httpstatus.io. Paste your old domain URLs and confirm each returns a 301 status code leading to the correct new URL.
- Check your new domain in GSC for crawl errors under Coverage → Errors. Common issues at this stage include 404 errors on pages the sitemap references.
- Confirm your SSL certificate is active on the new domain. Hostinger issues free SSL certificates automatically, but verify HTTPS is loading without mixed content warnings using your browser’s developer tools.
Week 2:
- Compare organic traffic on your new domain against the benchmarks you recorded in Phase 1. Some temporary fluctuation (10–20% dip) is normal as Google processes the change. A drop beyond 30% signals a technical issue that needs immediate attention.
- Check for any broken internal links using a crawling tool. These are links that your old domain’s pages had pointing to other old domain pages that were not updated by Better Search Replace.
Weeks 3–6:
- Monitor keyword rankings weekly using Rank Math’s built-in rank tracker or a tool like Google Search Console’s Performance report.
- Update your email signature, social media profiles (Instagram bio, X/Twitter bio, LinkedIn, YouTube channel description), and any guest post author bios with your new domain URL.
- Contact the owners of your top 10–20 backlink sources and politely request that they update the link to your new domain. Your 301 redirects handle this automatically in terms of link equity, but direct links to the new domain carry slightly more weight than redirected links over time.
Keep your old domain active for at least 12 months. Do not let it expire. Maintain the 301 redirects for the full year to give Google, Bing, and all inbound link sources time to update their records. After 12 months, the majority of your authority will have transferred, and you can reassess whether to renew the old domain.
How Long Before Your Traffic Fully Recovers?
This is the question every blogger asks. The honest answer: it depends on your execution quality and the age of your domain.
For a well-executed migration with all 301 redirects in place, a new sitemap submitted, and the GSC Change of Address tool used, most sites see:
- Days 1–14: Google begins recrawling the new domain. Impressions in GSC start appearing. Some ranking fluctuations are normal.
- Weeks 3–8: Most pages regain their original positions. Traffic on the new domain begins matching pre-migration levels.
- Months 3–6: Full recovery for established domains. For newer blogs with less than 12 months of history, recovery is often faster because there are fewer historical signals to re-evaluate.
The critical differentiator is redirect quality. Blogs that use wildcard redirects (redirecting all old pages to the homepage rather than to specific matching pages) can take 12–18 months to recover, if they recover at all. Blogs that implement page-level 301 redirects and follow the full protocol in this guide typically see full recovery within 60–90 days.
Phase 9: Fixing 404 Errors on Posts After Copying Your Site in Hostinger
This is one of the most commonly reported issues after using Hostinger’s Copy Website feature, and one of the most fixable. You visit your new domain and the homepage loads perfectly, but every post or page link returns a 404 error. The content is there; it simply cannot be reached through its URL.
Here is exactly what causes it and exactly how to fix it, in order of ease.
Why This Happens
The root cause is almost always the .htaccess file or WordPress’s permalink flush. When WordPress copies your site to a new domain, the .htaccess file, the Apache server configuration file that tells Hostinger how to route URL requests to the right content, may not copy cleanly, or it may need to be rewritten for the new server environment. Until WordPress regenerates the correct rewrite rules for the new domain, every URL beyond the homepage returns a 404.
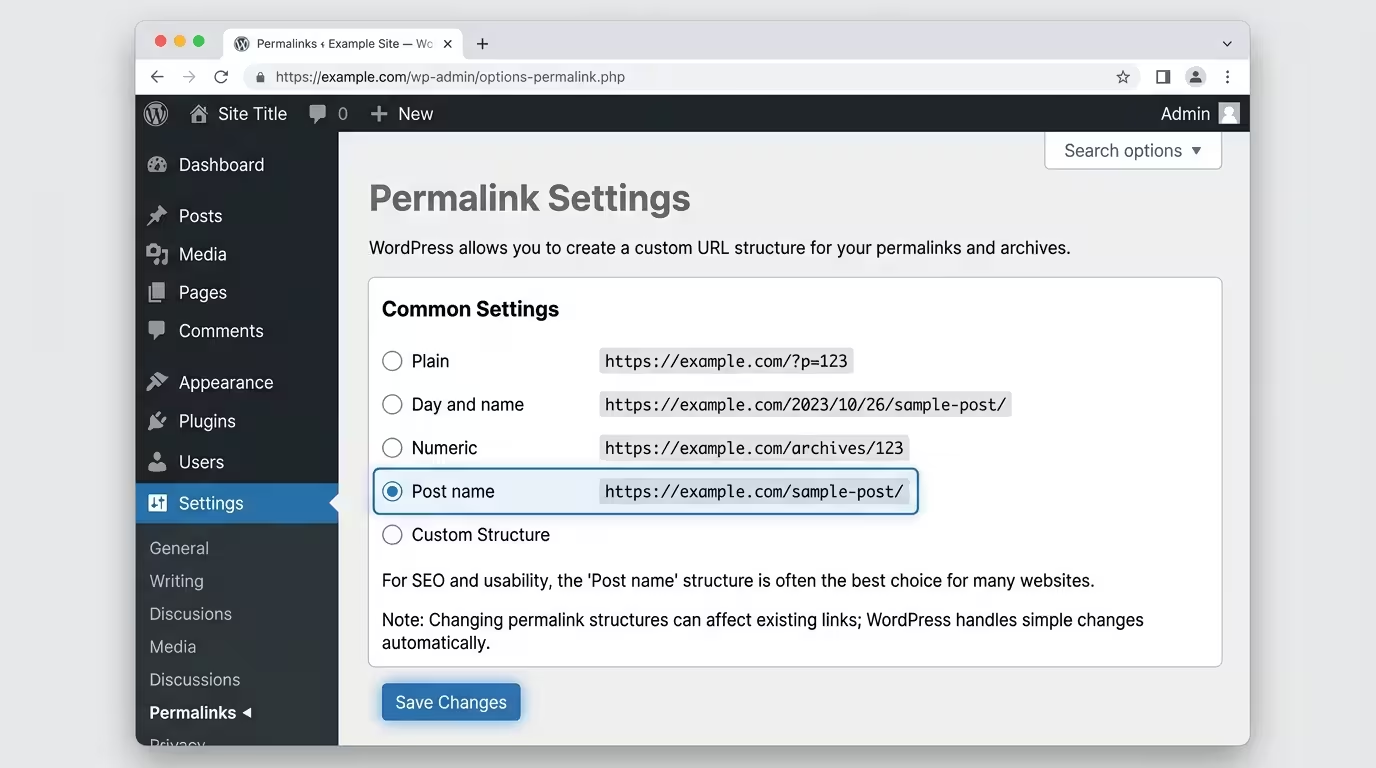
Fix 1: Reset Your Permalink Structure (Do This First)
This solves the problem in the majority of cases and takes under 60 seconds.
Step 1: Log in to your new domain’s WordPress dashboard.
Step 2: Go to Settings → Permalinks.
Step 3: Note your current permalink structure (likely “Post name”). Temporarily select a different structure, such as Plain, and click Save Changes.
Step 4: Switch back to your original structure (e.g., “Post name”) and click Save Changes a second time.
This forces WordPress to regenerate its rewrite rules and rewrite the .htaccess file from scratch. Clear your browser cache and LiteSpeed Cache after saving, then test a post URL. In most cases, this is the only step you will need.
Fix 2: Recreate the .htaccess File Manually
If resetting permalinks does not resolve the 404s, the .htaccess file itself is missing, corrupted, or contains conflicting rules from the old domain.
Step 1: In hPanel, go to Websites → Dashboard → File Manager.
Step 2: Navigate to the public_html folder and locate the .htaccess file. If you cannot see it, enable hidden files: in File Manager, click Settings or the eye icon and enable “Show Hidden Files.”
Step 3: Rename the existing file to .htaccess_old to disable it without deleting it (this keeps your old configuration as a backup).
Step 4: Create a new file in the same public_html directory named .htaccess. Open it and paste the following default WordPress code:
# BEGIN WordPress
<IfModule mod_rewrite.c>
RewriteEngine On
RewriteBase /
RewriteRule ^index\.php$ – [L]
RewriteCond %{REQUEST_FILENAME} !-f
RewriteCond %{REQUEST_FILENAME} !-d
RewriteRule . /index.php [L]
</IfModule>
# END WordPress
Step 5: Save the file. Return to Settings → Permalinks in your WordPress dashboard and click Save Changes once more to write the full permalink rewrite rules into this clean .htaccess file.
Test your post URLs again. They should resolve correctly.
Fix 3: Fix File Ownership and Permissions
If both fixes above still leave 404 errors, the issue may be file permission errors; the new server cannot read the files correctly because the ownership settings carried over incorrectly from the source domain.
Step 1: In hPanel, navigate to Websites → Dashboard → Advanced → Fix File Ownership.
Step 2: Select your new domain, check the confirmation box, and click Execute.
This resets all files to Hostinger’s default permissions (644 for files, 755 for directories), which gives the server the correct read access. The process takes one to two minutes. Clear all caches immediately afterwards and retest.
Fix 4: Use Hostinger’s AI Troubleshooter
Hostinger provides a built-in AI Troubleshooter in hPanel that scans your WordPress installation and detects common post-migration errors, including permalink and .htaccess issues, automatically.
Step 1: In hPanel, go to Websites → Dashboard.
Step 2: In the left sidebar, click on WordPress → AI Troubleshooter.
Step 3: Run the scan. If it detects permalink or configuration issues, click Fix My Website to apply the automated fix.
This tool is particularly useful if you are not confident navigating the File Manager manually or if the first three fixes have not fully resolved the issue.
One More Check: WordPress Site URL Settings
In some cases, after using the Copy Website tool, the siteurl and home values in the WordPress database still reference the old domain. This causes the site to load the homepage from the new domain but route all internal links back to the old one, which returns 404 if the old site no longer exists at that address.
Step 1: Go to Settings → General in your new domain’s WordPress dashboard.
Step 2: Confirm that both the WordPress Address (URL) and Site Address (URL) fields show your new domain (e.g., https://newdomain.com), not the old one.
Step 3: If either field shows the old domain, correct it, scroll down, and click Save Changes.
If you cannot access WordPress settings because the entire admin area is returning 404, you can fix this directly in the database. In hPanel, go to Websites → Dashboard → phpMyAdmin, open your WordPress database, and find the wp_options table. Edit the option_value for both siteurl and home to your correct new domain URL.
FAQ
1. Can I change my WordPress domain name on Hostinger without losing my content?
Yes. Hostinger’s Copy Website feature (available on Premium plans and above) duplicates your entire WordPress installation to a new domain, preserving all posts, pages, theme settings, and plugins. The tool automatically updates domain references in the database during the copy process.
2. Will my Foxiz theme settings transfer to the new domain automatically?
When you use Hostinger’s Copy Website tool, Foxiz theme settings stored in the WordPress database are transferred with the copy. You will need to reactivate your ThemeForest purchase code on the new domain, regenerate dynamic CSS files via Foxiz Theme Options, and run Elementor’s Replace URL tool if you use Elementor alongside Foxiz.
3. How long does WordPress domain migration take on Hostinger?
The Copy Website process in hPanel typically takes up to 15 minutes for most WordPress blogs. DNS propagation after you make the switch takes between 1 and 24 hours, depending on your TTL settings. If you lower your TTL to 300 seconds 48 hours before migration (as recommended in Phase 1), propagation will complete in under 10 minutes.
4. Do I need to buy a new hosting plan for my new domain?
Not necessarily. Hostinger’s shared hosting plans support multiple websites under one account. You can add your new domain to your existing plan without purchasing additional hosting. Check your plan’s website limit in hPanel under Hosting → Plan Details.
5. What is a 301 redirect, and why is it essential for this migration?
A 301 redirect is a permanent server instruction that sends visitors and search engine crawlers from an old URL to a new one. It passes the SEO authority (link equity) from the old URL to the new destination, which is why it is the correct redirect type for a domain change. Using a 302 (temporary) redirect instead of a 301 tells search engines the move is not permanent, and they will not transfer ranking signals.
6. How do I know if my 301 redirects are working after migration?
Use a free tool like httpstatus.io. Enter any URL from your old domain, and the tool will show you the HTTP status code it returns. A properly configured 301 redirect returns status code 301 and shows the new destination URL. A broken redirect returns 404, and a misdirected redirect returns 302.
7. Should I change my domain name and redesign my site at the same time?
No. Making multiple major changes simultaneously makes it very difficult to diagnose problems if something goes wrong. Complete the domain migration first, confirm traffic has stabilised on the new domain, and then proceed with any redesign or major structural changes.
8. What happens to my Google AdSense account when I change domains?
You need to add your new domain to your AdSense account as an approved site. Go to AdSense → Sites → Add Site, enter your new domain, and wait for approval. Until the new domain is approved, ads may not display correctly, particularly on Foxiz’s built-in ad placement slots.
9. Will my email accounts change if I migrate to a new domain on Hostinger?
Yes. If you use Hostinger email accounts tied to your old domain (e.g., hello@olddomain.com), you will need to create new email accounts for your new domain in hPanel. Hostinger’s Copy Website tool does not migrate email accounts. Set up new accounts under Emails → Email Accounts and update any email signatures or business listings accordingly.
10. Do I need to notify my social media followers about the domain change?
Yes. Publish an announcement post on your blog, your email newsletter, and your social media profiles explaining the domain change and the new address. This helps direct referral traffic to the right place and maintains audience trust during the transition. Consider updating link-in-bio tools (like Linktree or Beacons) immediately on migration day.
11. After copying my WordPress site to a new domain on Hostinger, my posts show 404 errors. What went wrong?
This is one of the most common post-migration issues on Hostinger, and it is almost always caused by WordPress’s permalink rewrite rules not updating correctly for the new domain environment. The fix is straightforward: go to Settings → Permalinks in your new WordPress dashboard, temporarily switch to a different permalink structure, save, switch back to your original structure, and save again. This forces WordPress to regenerate the URL routing rules in your .htaccess file. If that does not resolve it, recreate the .htaccess file manually via Hostinger’s File Manager using the default WordPress rewrite code, then use Advanced → Fix File Ownership in hPanel to reset file permissions. Full step-by-step instructions are in Phase 9 of this guide.
A WordPress domain migration is one of the most consequential technical decisions you will make as a blogger, but it is a manageable one. The bloggers who lose traffic are those who skip preparation, rely on guesswork, or treat the process as a single step rather than a phased operation.
You now have the complete execution framework:
- Audit and back up your site before touching anything.
- Use Hostinger’s Copy Website tool to clone your blog to the new domain without manual file handling.
- Run Better Search Replace to catch any residual old-domain URLs in your database.
- Implement page-level 301 redirects on your old domain using Rank Math or .htaccess.
- Reactivate and reconfigure your Foxiz theme on the new domain.
- Use Google Search Console’s Change of Address tool to accelerate Google’s processing of the move.
- If posts return 404 errors after copying, reset your permalink structure in WordPress Settings and recreate your .htaccess file via Hostinger’s File Manager.
- Monitor for four to six weeks and fix any crawl errors or broken redirects immediately.
Your old domain worked hard to build your current traffic. This process ensures every bit of that work follows you to your new address.
If you would like expert guidance through your specific migration or a professional audit of your WordPress setup before you make the move, book a Transformation Clarity Call (TCC) with the DSE Consulting team. We will review your current site, map your redirect plan, and walk through the migration sequence with you step by step.